Showing posts with label DIY. Show all posts

Sunday

$24 POTTERY BARN HACK

Flipping through a Pottery Barn catalogue recently, I was thrilled to see these interesting navy and white ikat prints--aren't they striking? They reminded me of a new set of table linens that World Market is carrying, and that, the previous week, I had sadly left behind in the store because, after considerable effort, I could not think of a justifiable reason for buying them.

When I saw these prints, I knew exactly why I "had" to have the World Market linens. Hurrah! Six different Pottery Barn prints, $156 a piece, or $929 for the set. 

Here's my version: World Market linens in IKEA frames, for $24 each (frames plus napkins), or $48 for the set. 

Unfortunately, I can't show them as a display, because I'm planning to hang them in my office, but you get the general idea. I went with white RIBBA frames from IKEA, instead of black, because I like an airer look. I'm crazy about the chevron ikat.

A view of the Pottery Barn prints in a bedroom. You could absolutely do them with black frames, too. 

World Market's ikat linens. I used the napkins, and there are at least four patterns--they run about $3.99 each (two are shown here).

This chevron ikat is my favorite by far!

And look what happened--I ended up just buying them for my table, too. They're marvelous with the Juliska Country Estate pattern. I've started collecting the set due to family pressure (it's the South. You must have dayware and china patterns chosen for family and friends to gift you with over the holidays, and this is not optional). P.S. The placemats have a different pattern on each side, which is very fun.

I chose Country Estate because it's chinoiserie/British/blue and white awesomeness/has matching ginger jars. And, because it has a special place in my heart. I first discovered Isis Ceramics, of which Juliska's pattern is the mass-market version, when I was at Oxford. The little dish in the upper left hand corner is one of Isis' hand-painted scenes of the University. The little elephants are salt and pepper shakers, another World Market find.

Juliska Country Estate.

Back to wall art. This is how I'll hang the set (propped up, as you can see). The rather crooked piece in the center is my attempt at framing a paper cut out I purchased in Shanghai. Plainly, I'm going to have to get a professional on the job, but it will play nicely with the ikat patterns.

If you wanted to exactly duplicate the Pottery Barn look, IKEA has these black frames, also for $20 each.
/Images/ Pottery Barn, IKEA, Juliska, my own/

Tuesday

JEWELED TOPIARY

Since we're still in the 12 Days of Christmas, I feel justified in one more Christmas post—this one about my favorite, and simplest, bit of holiday decorating this year. I have a mossy topiary that lives year round on a Chinese garden stool in my living room, but it was looking a touch summary for the season. After a brief hunt through my costume jewelry, I turned up enough brooches and pins to dress it up for the holidays, pinned them all into the moss, and voila!, a jeweled topiary. And now that I can see all of my pins in plain view, perhaps I'll remember to wear them...

I love the star-shaped brooch, center, but the tiny little turtle crawling away, upper left, is a darling.


There are a few earrings in the mix too—a pair of starry studs, and even a dangler, lower left hand side. You could certainly make almost any piece of jewelry work—even necklaces could make a "tinsel" garland!
  /All photos by Sanity Fair. Please request permission to use./

Wednesday

SMALL ROOM DECORATING MAGAZINE

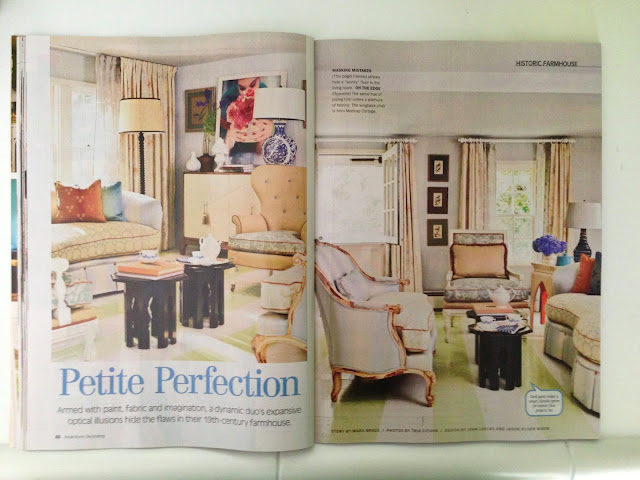
Back in January, Small Room Decorating shot my apartment - all 425 square feet of it. Photographer Helen Norman meticulously, and beautifully, documented every inch of the space (though not so many inches, to borrow a phrase from J.M. Barrie), while writer and stylist Charlotte Safavi brought in lovely, fresh touches with flowers.

The issue came out last week! I'm hoping to have some of Helen's beautiful photos to share soon, but in the meantime, here are a few shots of the spread.

Small Room Decorating is on newsstands now, at Barnes and Noble, Target, CVS, and Safeway.

The issue also features two of my favorite designers, the pattern-mad daredevils of Madcap Cottage:  John Loecke and Jason Oliver Nixon!

Monday

DIY LATTICE RIBBON PILLOWS

Effortless Style blogger Camila posted this fantastic pillow DIY, and I thought it was just a genius idea - and perhaps one that you didn't have to be a genius to pull off, since my craft skills are pretty much limited to anything that doesn't require precise measuring. I particularly wanted new pillows because, back in the Fall, I was lucky enough to have my apartment photographed by The Washington Post. But, when the photographs were published, I noticed something I hadn't seen before... the pillows and curtains didn't really match. They USED to match, but sun exposure had faded some hues more than others. And of course, once I noticed it, I noticed it every day. I really wanted to change my pillow covers, but without a major financial investment, so I decided to make my own.

Then:  slightly different shades (Photo by Katherine Frey).

Now:  I kept the emerald green ikat pillows, and made my own lime green ribbon lattice pillows, adding a leopard print pillow that I LOVE, purchased on Etsy. 

A close-up of the pillows.

Want to have a pair of your own? They're so easy to make! I used RITVA pillow covers from IKEA, for $7.99 each, and grosgrain ribbon. I decided to go with a bold pattern (surprise) using a wide ribbon centered more on the pillow, 4 inches from the edge. Without cutting the ribbon, I loosely laid out my pattern to try the look.

Take your time to get it right! I cut extra inches to fold the edges into the pillow seams for a finished look, and then wove the ribbons over/under, pinning them in place. I cut four 21 inch ribbons for the "square" part of the pattern, and four 19 inch ribbons for the cross pieces. ALSO:  the IKEA pillow covers were supposed to be 22x22, but were actually slightly different sizes. You may need to eyeball the final look, rather than relying on your measuring tape.

Tuck your ribbon edges into the seams as below, and be careful not to glump the fabric glue - as you can see, it will spot a bit if too much is applied.

After you've glued down each ribbon, take a toothpick and run a little glue under the edge of the ribbon wherever it bulges. This will keep it from rippling when the pillow is plumped inside. (I made these over Christmas vacation, so my Dad took some photos. He has requested credit as photographer :).

And here's the result!

I really have a thing for leopard, and was delighted to find this lovely pillow in the AriannaBelle shop on Etsy. It's great quality, and she shipped it quickly. I think it just makes the space. To tie the pillow into the look, I added a few more leopard touches, including Jan Shower's decor book, Glamorous Rooms, with its animal cover, and a cheetah-print lucite tray. I made the tray myself - you can find the DIY here.

TIPS and SUPPLIES

You will need:  
IKEA pillow covers, fabric glue, several yards of ribbon, a tape measure, toothpicks, and stick pins.

-Be very careful not to get any glue on the zippers when folding under end pieces of ribbon. A simple piece of masking tape over the teeth will do the trick.

-Even though it dries clear, fabric glue can "stain" through the ribbon, and show up darker when dry, so you want to avoid applying too much. Applying glue in a  zig zag worked best,  and was less prone to leave a mark.

-It's pretty nigh impossible to glue the ribbons without wearing the adhesive - I found that nail polish remover will get fabric glue off your skin (tip within a tip:  don't get a manicure before doing this project). 

For the full DIY, visit Camila's post. Happy crafting!

DIY CHINOISERIE ETAGERE

My tiny little apartment suffers from awkward corner syndrome. In 425 square feet, there are five doorways/doors, a bump out, and numerous soffits. Some of the corners even have corners. So, part of my challenge has been finding pieces of furniture that will fit the space. One such spot was an 11 inch deep corner leading into the closet area. I REALLY needed to use the space for storage, but without making it feel even smaller. An etagere seemed like the perfect answer, but all the beautiful vintage pieces I found were just too deep. So I decided to MAKE an etagere. By which I mean:  go to IKEA and alter something they sold.

Here it is! A Chinoiserie etagere.


IKEA makes this VITTSJO shelving unit for $70. The open concept and glass shelves would keep the space from feeling overwhelmed, and there was plenty of room to stack books. The only problem was the black color, which didn't play nice with my green walls.

So I broke out the Rustoleum...

And then emailed Danika Herrick, founder of the fantastic company O'verlays, to ask if they had anything that would suss up a plain iron shelf. A week later, these arrived:  greek key corners! 

BEFORE

AFTER!

Seriously, O'verlays are the best thing since sliced bread. "Transforming" my shelf required about 10 minutes, some gorilla glue, and masking tape (to hold the greek key pieces in place while the glue dried). I waited an hour for good measure, whipped the tape off, and enjoyed my new Chinoiserie etagere. The O'verlay pieces are paintable, so you could customize them to any shade. I was lucky that they were already white!

A "through" view of the shelf. I love how spacious it feels, without blocking the view into the living room.

Check out all the other amazing O'verlay patterns HERE, and you can find my greek key corners HERE. A few more patterns and ideas below...

An O'verlay pattern under glass, dressing up a plain hall table. They also look great over mirrors.

On an ikea chest of drawers (also, Danika painted that wall herself. She's very talented).


/Images/ my own/ black shelf image, IKEA/ O'verlay patterns, O'verlays/

Wednesday

DIY ROLLER SHADE

I should have called this the "PIY" - "Paint It Yourself" - roller shade project. A few months ago, I ran across this image on Pinterest, and was so taken with the playful trompe l'oeil design mimicking austrian shades, or as they're more popularly called, balloon shades. It looked fun, colorful - and easy to duplicate. And I desperately needed an inexpensive shade for my kitchen. To the Home Depot!


I'm a very impatient DIY-er (as you'll soon see), and I just dashed quickly through the store, grabbing an assortment of brushes and supplies. The shade itself is medium-weight vinyl, for a grand $7.95, and the paint is black tempera craft paint. I purchased several brushes and sponges to try, but the one that worked best was a super cheap one-inch brush. The coarse bristles gave a look very similar to the professional design above. My window was much shorter than the shade, so I rolled the shade out full length, and then marked out six equally spaced marks before painting the full swags. As you can see, I quickly smeared and splattered paint all over - lucky for me, this is not a project that rewards precision.

In about 10 minutes, I had this. 

And there we are:  a sew-free, $15 window shade in the kitchen. All it needs is a tassel! I'll get around to that eventually.

 I just hung up the wall decor too; the green tortoise shell is Nate Berkus for Target, and the green chair print is from Jennifer over at The Pink Pagoda

One of my favorite New Yorker cartoons, clipped from the magazine. I dream about the "Horn of Extra Square Footage" every Thanksgiving.


A few other "PIY" shade ideas - wouldn't snaky squiggles be fun?

Or, free-hand a little greek key, a la Dana Gibson.
/Images/ Blue and white shade, Casa de Valentia/ Black and white shade photos, my own/ Snake painting, Jacques Grange Interiors/ Greek key shade, DecorPad/

Or try wavering stripes, circles, or polka dots! The possibilities are endless. Happy painting!

Disclosure

Shop Hop, Great Steals, and some posts may include paid links. View our disclosure policy here.

LinkWithin

Related Posts with Thumbnails